Why Isn't My Scope Hitting Where I Aim? A Troubleshooting Checklist
By Peter Makulek · Senior Optics Editor · · Live prices from UK retailers
This guide is not a product roundup — it is a troubleshooting order to work through when your point of impact does not match your point of aim. Whether you are shooting an air rifle at 25 yards, punching paper with a 10/22 at 50, running a bolt gun at 600, or competing in PRS matches past a thousand, the diagnostic flowchart is largely the same. The causes are ranked here from cheapest and most likely to rarest and most expensive, so you do not waste money or range time chasing the wrong problem. If your scope was zeroed last month and suddenly is not, or if you just mounted a new optic and cannot get it on paper, start at Step 1 and work down.
The single most important mindset shift is this: the scope itself is almost never the first thing that broke. Across every forum — r/airguns, r/22lr, r/longrange, r/precisionrifle — the pattern repeats. A shooter sees an unexplained miss, assumes the optic failed, and either sends it back for warranty or buys a new one, only to have the same problem reappear because the actual cause was never addressed. In the vast majority of cases the issue lives in the mounting hardware, the shooter's process, a parallax misunderstanding, or inconsistent ammunition, roughly in that order of likelihood. A genuine internal scope failure does happen, but it is the last thing you should suspect, not the first.
This checklist applies across platforms common in the US market: spring-piston and PCP air rifles (which produce unique bidirectional recoil that is brutal on optics), rimfire bolt actions and semi-autos in .22 LR, centerfire hunting rifles in cartridges from .243 Win to .300 Win Mag, AR-pattern rifles in 5.56/.223 and 6.5 Creedmoor, and purpose-built PRS rigs. Where a diagnostic step differs meaningfully by platform — for example, the way a spring-piston airgun's reverse recoil stresses a mount differently than a centerfire rifle's rearward-only recoil — the guide calls that out explicitly so you can apply the right fix to your specific setup.
One more note before we begin: scope not hitting where I aim troubleshooting questions flood online forums every week, and the answers are often scattered across dozens of contradictory threads. The goal here is to give you a single, ordered, walk-through-it-once resource you can bookmark and revisit. Every step is something you can do at home or at any public range with minimal tools — in most cases a torque driver, a solid rest, and a box of consistent ammunition are all you need. Work the list in order, do not skip ahead, and you will almost certainly find your problem before you reach the end.
Top Picks — Live UK Prices
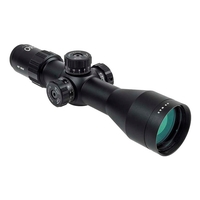
PAO HD MAX 4-16x44 SF FFP Ultra Compact Riflescope
via Uttings
£219.00
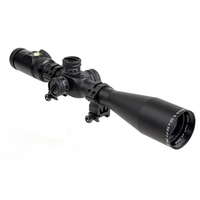
PAO F1 5-20x50 IR SF FFP Rifle Scope
via Uttings
£239.00

Hawke Vantage 30 WA FFP 4-16x50 Rifle Scope
via Uttings
£249.00
Buying Advice
This is a diagnostic checklist, not a buyer's guide. AIScopes normally publishes product roundups with specific optic recommendations, but this page is structured differently on purpose. There are no ranked product picks here and no 'best scope under $500' sections. Instead, every paragraph below maps to a single diagnostic step you should perform in sequence. The order matters: each step is arranged so you rule out the cheapest, most common, and fastest-to-check cause before moving on to anything more involved. If you follow the sequence honestly — resisting the urge to skip to the step that sounds most interesting — you will isolate the problem faster and spend less money doing it. Bookmark this page and pull it up the next time you are at the range staring at a group that landed somewhere you did not expect.
Step 1 is to check mount and ring torque first, because it is the cheapest and most common cause of a scope that will not hold zero. A single loose ring-cap screw, base screw, or Picatinny rail clamp can let the scope shift under recoil — or even under the jostling of normal transport — without the shooter noticing. The result is an apparent random miss that looks like an internal scope failure but is not. Before you touch a single turret, grab an inch-pound torque driver (a quality one costs roughly $25–$50 and is worth owning permanently) and check every fastener against the mount and scope manufacturer's documented torque spec. There is no single universal number: different ring-cap screw diameters, different base-screw thread pitches, and different scope-tube materials all call for different values, typically ranging from around 15 to 25 inch-pounds for ring-cap screws and 20 to 65 inch-pounds for base screws, depending on hardware. Always use the specific value printed in your mount's instructions. On spring-piston air rifles, pay special attention to the mount-to-rail interface — the bidirectional recoil of a spring gun walks scope mounts forward, and a dovetail-to-Picatinny adapter or an arrestor pin/recoil stop is often necessary to keep things locked in place.
Step 2 is to verify the zero has not actually shifted by re-shooting a known-distance group. Set up at whatever distance you originally zeroed — 25 yards for most air rifles, 50 for rimfire, 100 for a typical centerfire hunting rifle — and fire a fresh three-to-five-shot group from the most solid, supported rest you can build: sandbags front and rear, a bipod with a filled rear bag, or a proper benchrest. A single shot that lands off your aim point proves nothing; it could be a flinch, inconsistent cheek weld, a gust of wind, or an unstable rest. A group of three to five shots, each fired with a deliberate pause and a called follow-through, is what actually tells you whether the zero moved or whether you pulled one shot. If the group is centered where you expect, your zero is fine — the earlier miss was shooter-induced. If the entire group has shifted consistently in one direction, you have a genuine zero shift and should look at Steps 1, 3, and 4 for the cause. For PRS and long-range shooters, fire this verification group before making any turret adjustment; chasing a single miss with a correction click is one of the fastest ways to lose a perfectly good zero.
Step 3 is to check parallax adjustment if your scope has one — either a side-focus knob or an adjustable objective bell. Parallax error occurs when the target image and the reticle are not focused on the same focal plane inside the scope. When parallax is present, moving your eye even slightly off the optical axis behind the scope causes the reticle to appear to shift against the target, which means your point of aim changes based on head position even though the crosshair looks steady. This effect grows with magnification and worsens the further your parallax setting is from the actual target distance. To check, set the scope at high magnification, aim at a small, well-defined target, and gently move your head side to side behind the eyepiece — if the reticle slides against the target, parallax is not dialed out. Adjust the side-focus or AO ring until the reticle stops moving relative to the target. Fixed-parallax scopes — common on many rimfire and air-rifle optics (factory-set around 50 to 100 yards) and on some fixed-power hunting scopes (often set around 100 to 150 yards) — will inherently show more parallax error at distances far from that factory setting. That is a design tradeoff for simplicity and cost, not a defect, but it can absolutely contribute to misses at ranges well inside or well beyond the factory parallax distance.
Step 4 is to consider ammo or handload consistency last, after you have ruled out the mount, the zero, and parallax. Inconsistent ammunition — varying muzzle velocity, bullet seating depth, or bullet weight — genuinely can shift group center or open groups up. But it is the least likely cause of a sudden or dramatic point-of-impact shift and is the factor most commonly (and wrongly) blamed first. If you switched ammo lots or brands between range sessions, try going back to the original lot. For rimfire shooters, the variation between brands of .22 LR is notoriously large — a rifle that shoots CCI Standard Velocity into half-inch groups at 50 yards may scatter bulk-pack ammo into two inches — so always test accuracy claims with the same ammo you zeroed with. For handloaders, check seating depth consistency, powder charge uniformity, and case neck tension. For centerfire factory ammo, sticking with a single SKU from a quality manufacturer (Federal Gold Medal Match, Hornady ELD Match, etc.) eliminates most ammo-caused variables. The key principle: do not swap ammo as a troubleshooting step until you have confirmed the mechanical system — mount, scope, and parallax — is sound.
When it is none of the above, you may be dealing with a genuine internal scope failure, and that does happen — but it is rare compared to the four checks above. The most common internal failure mode is a broken or stuck erector tube spring: the erector assembly is the spring-loaded mechanism inside the scope body that actually moves the reticle when you dial turrets, and if a spring fatigues, cracks, or unseats, the scope can produce a zero that wanders unpredictably or refuses to track adjustments consistently. Another less common issue is a reticle that has physically shifted within the erector cell due to an adhesive failure or impact damage. You can perform a rough tracking test at home: mount the scope solidly, aim at a grid target, dial a known number of clicks in one direction, confirm the reticle moves the expected amount (e.g., 10 clicks of 1/4 MOA = 2.5 MOA total, which is roughly 2.6 inches at 100 yards), then dial back and confirm return to the original point of aim. If the scope does not track the expected amount, does not return to its original setting, or tracks inconsistently in one axis, the erector system is likely damaged. At that point, contact the manufacturer's warranty department — most reputable US-market scope brands (Vortex, Leupold, Nightforce, Athlon, Primary Arms, among others) offer robust lifetime or limited-lifetime warranties and will repair or replace a genuinely defective unit.
Frequently Asked Questions
What's the first thing I should check if my scope isn't hitting where I aim?
Check your mount and ring torque before anything else. A loose ring-cap screw or base screw is the single most common cause of an apparent scope problem and costs nothing to rule out. Use an inch-pound torque driver set to the mount manufacturer's specified value — not a guess — and verify every fastener. This five-minute check eliminates the most frequent cause of a wandering zero.
Can a loose scope mount cause a shot to miss even if the scope itself is fine?
Absolutely. If even one ring-cap screw or base screw is undertorqued, the scope tube can shift microscopically under recoil, transport vibration, or even the handling of shouldering the rifle. Because the shift is tiny, it is invisible to the naked eye, but at 100 yards even a thousandth-of-an-inch movement at the mount translates to a noticeable point-of-impact shift downrange. The scope optics and turrets can be perfect — the miss is entirely mechanical.
How do I tell if my zero actually shifted versus me flinching or using a bad rest?
Shoot a three-to-five-shot group from the most stable supported position you can build — front bags and a rear squeeze bag, or a solid bench with a lead sled. A single off shot can always be shooter error. If the entire group is centered where you expect, your zero is fine and the earlier miss was technique. If the whole group has moved consistently in one direction compared to your original zero, the zero has genuinely shifted and you need to investigate the cause.
Can parallax alone cause a miss, or does it just blur the image?
Parallax can absolutely cause a miss, not just a blurry image. When parallax is present, your point of aim shifts based on where your eye sits behind the scope — even a small, unconscious head movement changes where the reticle appears on the target. At high magnification this can shift impact by an inch or more at 100 yards. The blurry image is a symptom that parallax is not dialed out, but the real accuracy cost is the aim-point shift.
Should I blame my ammo before I've checked my mount and zero?
No. Ammo inconsistency can open groups and shift group centers, but it is the least likely cause of a sudden, dramatic point-of-impact change and should be the last variable you test. Always confirm that your mount hardware is properly torqued, your zero is verified with a proper group, and your parallax is dialed out before you start swapping ammo. Chasing an ammo theory first wastes range time and money.
How tight should scope rings be if I don't have a torque wrench?
The honest answer is that you should get a torque wrench — an inch-pound torque driver suitable for scope-ring work costs roughly $25–$50 and is one of the best investments a shooter can make. Without one, you are guessing, and both undertorquing (scope slips) and overtorquing (crushed scope tube, stripped threads, cracked ring) are common and expensive mistakes. If you are truly stuck at the range without one, tighten ring-cap screws in an alternating cross pattern to snug-plus-a-quarter-turn, but plan to re-torque to spec as soon as possible.
Does this troubleshooting checklist apply to air rifles and rimfire, or just centerfire?
It applies across all platforms — air rifle, rimfire, and centerfire — with minor differences. Spring-piston air rifles produce bidirectional recoil that is uniquely hard on mounts, so mount security (Step 1) is even more critical and may require a recoil stop or arrestor block. Fixed-parallax scopes are more common on rimfire and air-rifle platforms, so Step 3 may involve accepting a design tradeoff rather than dialing a side-focus knob. The overall diagnostic order remains the same.
How can I tell if my scope's internal erector tube has actually failed?
Perform a tracking test: with the scope solidly mounted, aim at a grid target, dial a known number of clicks (for example, 10 clicks of 1/4 MOA), and confirm the reticle moves the predicted amount at 100 yards (in this case about 2.6 inches, using 1 MOA = 1.047 inches at 100 yards). Then dial back the same number of clicks and confirm the reticle returns to exactly the original aim point. If the movement does not match the expected value, or the scope does not return to its starting point, the erector spring or internal mechanism is likely damaged and you should contact the manufacturer for warranty service.
Is there a difference in how FFP and SFP scopes behave when diagnosing a zero issue?
The diagnostic steps are the same for both, but there is one important nuance at Step 2: on a second-focal-plane scope the reticle subtensions are only accurate at one specific magnification (usually the highest), so if you are using holdovers or mil/MOA marks to confirm tracking, make sure you are on the correct power setting. On a first-focal-plane scope the reticle scales with magnification and subtensions are accurate at any power, which makes tracking tests slightly more straightforward. Neither type is more prone to zero shift than the other.
Related guides
How zero-stop turrets work, which US-market systems (Leupold CDS-ZL, Vortex CRS, Nightforce ZeroStop, Bushnell RevLimiter) to buy, and how to choose by budget and discipline in 2026.
How to Sight In a Rifle Scope: Step-by-Step First-Time GuideFirst time sighting in a rifle scope? Our 2026 step-by-step US guide walks you through mounting, bore-sighting, and dialing in your zero at 25 and 100 yards.
LPVO Zero Distance: How to Choose & Why It MattersLearn the optimal zero distance for your LPVO rifle scope in 2026. Covers 50 vs 100-yard zero, BDC reticles, FFP vs SFP, and the best scope picks for US hunters and competitors.
How to Swap Day and Night Optics on the Same RifleLearn how to swap between a day rifle scope and a night vision scope on the same rifle without losing zero. Covers mounts, reticles, zeroing tips, and top picks for US hunters.
Why Your Scope Rings Won't Close Evenly — And How to Fix ItScope rings won't close evenly? Learn exactly why it happens, how to fix it, and which rings and mounts eliminate the problem for good. 2026 US buyer's guide.
Best Clip-On Thermal Imagers 2026Find the best clip-on thermal imager for your day scope in 2026. We cover mounting, detection range, realistic price tiers, and top picks for US hunters and shooters.
Thermal vs Night Vision: Which Should You Buy First?Thermal vs night vision — which to buy first in 2026? Our US-focused decision guide breaks down detection vs identification, real price tiers, and the best pick for your use case.
Not sure which scope is right for you?
Try our AI-powered scope finder — answer a few questions and get personalised recommendations.
Find My Scope →Get a UK scope tip every day
Follow AiScopes on Facebook for daily buying guides, deals and gear advice.
Follow on Facebook